-
Brakes:
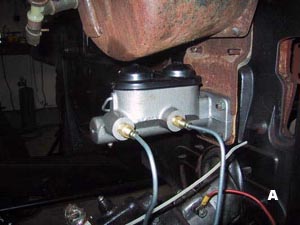
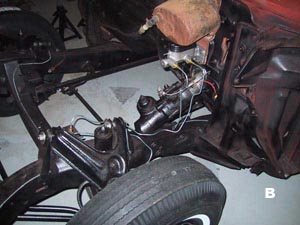
I have replaced all portions of the brakes with new items. The Master Cylinder has been changed to a dual reservoir unit that fits full-size Chrysler cars from 1967-69. I will not be able to test it until the car is running at some point in the future, so I'll give a report on this as it becomes proven as a working solution (or not). I understand that the brakes work best if the shoes are arced (ground) to fit the curvature of the drums, but will be installing the shoes and then allowing them to bed into the drums with use.
At this point, the drums are in really superior shape with no pitting or hot spots on them. Pitting and grooves come from use, and I think that the drums were turned shortly before the car was put away. Hotspots are places on drums that are hardened at a metallurgic level and resist being cut away when being turned. I understand that they come from parking a car with really hot shoes. Where the shoes contact the drum, the heat builds up and creates a portion of the braking surface that is hardened and makes for an uneven braking surface, as it does not wear away at the same rate as the surrounding drum surface. Each of the four drums is specific to its corner of the car, as there are both left and right threaded lug-nuts. These were designed in by Chrysler Engineering under the principal that the torsional forces that a wheel encounters in use can cause a loose lug-nut to back itself off of its stud. The reversed threads on one side make that side self-tightening. All threaded studs on the drums have a L or R stamped on them, and the front is different from the rear, so that's how there are 4 different drums that are not supposed to be interchanged (although you can swap them from left to right in a pinch if you don't have any choice).
Tubing Bender

|
The brake lines were all straight when I bought them from the parts store, and I used a tubing bender to create the bends and curves in the new brake lines. This tool works just like the tubing benders that are just like the much larger ones used by electricians to bend conduit (See picture to right).
Brake Spring Tool

|
This hand tool (to the left) is cheap and a lifesaver when it comes to installing the brake pad-to-hub springs in the brakes. The springs on my pictures were painted red and I used this tool when one end of the spring was hooked onto the brake pad and the other was meant to get stretched over and onto the hub. Squeezing the tool while it is hooked onto the spring and anchored on the hub stretches the very stiff spring, pulling on it to allow it to be hooked onto its anchor point on the (painted silver) part of the hub.
A. Dual Master Cylinder; B. Master Cylinder Installed;
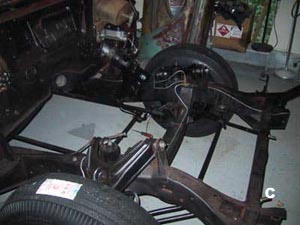
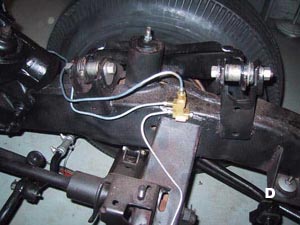
C. Frame Layout; D. Master Cylinder Plumbing;
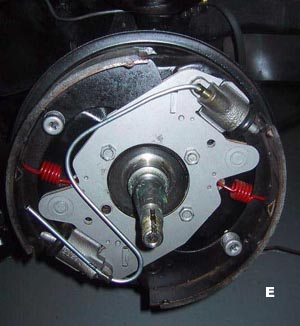
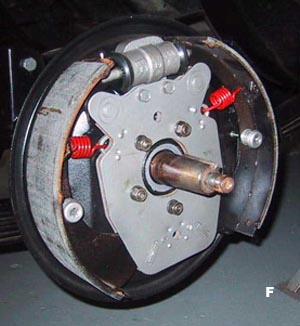
E. Front Brakes Completed; F. Rear Brakes Completed.
|
|
|
|
|
|
-
Some other tools worth looking at:
-
Air ratchet: skip ratcheting by hand. Cheap and very convenient!
-
Magnet on a flexible wand for retrieving little junk that falls where you can't get to it otherwise. The grabber is a wound wire tube with a plunger handle. Push down on the plunger like a syringe, and 4 wire tongs come out, and this can be used for grabbing items that the magnet can't get.
-
Die Grinder with Wire Brush. This tool spins a wheel at very high speeds and is used for cutting with the disc or a wire wheel can be inserted to remove rust, paint, or other residue from metal.
-
Die grinder with cutting disc.
-
A favorite with the six-year old around the corner, and great all-purpose tools that get used more often than you'd expect.
-
Impact wrench works like a gun and is the buzzing, whirring sound that you hear at the tire place. Excellent for loosening tight bolts and quickly dismantling things. Too strong for sheet metal bolts.
-
Buy the best air hose you can get. But, get long and short ones. Distance can cause a drop in air pressure.
-
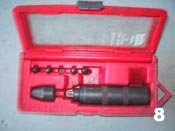 The Impact Screwdriver is very useful and should not be done without. The cylinder has a mechanism in it that allows impacts from a hammer on the end to be translated into torsion. The unit has a 3/8" socket wrench head that can be used in conjunction with regular sockets or with the tri-angular tip that you see that accepts the various size Phillips bits that are made of hardened steel.
When you have a stubborn screw that might be prone to stripping, inserting the Phillips tip into the slot, holding the tool in the slot and gently twisting it in the direction that you want to turn it will set you up. You then use a hammer to strike the tool on the flat end, driving it into the screw and translating the blow into a twisting motion. This normally breaks even the most stubborn screws loose. I found it especially useful with older Japanese motorcycles, which have an abundance of Phillips screws that are made of infernally soft metal that loves to strip out.
-
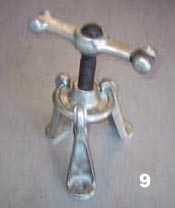
This is the Hub Puller tool (at right) that gets your hubs off. There is a large nut holding on each of the brake drums. This nut is removed and the 3 legs of the tool are then fitted over the lug-nut studs. The lug nuts are then tightened lightly to hold the tool down onto the drum. The center black rod is threaded and the top part that looks like a handle slides off of a hexagonal top that can have a breaker-bar and socket or impact wrench applied to it. The silver "handle" looks like a big dog bone, and can be struck with a hammer instead of using a wrench, hence the flared ends. This works not unlike old-fashioned English knock-off wire car wheels. The impact wrench and a deep socket made short work of pulling off all drums with this tool.
-
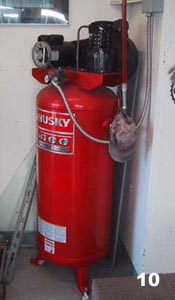 A good compressor is the heart of most of the air tools seen here. I went to Campbell-Hausfeld's web site and got a reconditioned one after being on a waiting list. This is a factory-only program and is only on their website. 4 weeks netted a $200 savings. The one that I got is single stage with an 80 gallon holding tank. The large tank is important, as the compressor fills the tank and the air is held as a reserve for when you use your tool. Too small a tank and your system won't be able to keep up with demand. My last compressor was 30 gallons, and when sanding, I had to stop and wait for the compressor to catch up during heavy use.
The compressor has a separate valve at the side so that I can cut the flow of air. If the compressor lines leak at all, the leak will draw down the air pressure, and the compressor will start up to refill itself, wasting electricity if not turned off or sealed with a manual valve close to the compressor (there's a baseball cap hanging off of my shutoff valve in the picture). Having a shut-off air valve is an easy way to allow you to dis-assemble and work on your lines downstream of the compressor if needed without having to drain the tank.
-
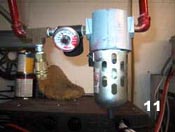 The air in your compressor & hoses has moisture in it when it is sucked in, and as the air is forced out of the compressor, it gets cold and the water in it condenses from vapor to water. This is very hard on the bearings of your tools as the air is forced through them and death if you are spraying paint. The water trap on my system is mediocre, but does get most of the water that condenses in the lines, keeping the water from getting all of the way to the air tools. It's tough to see, but the silver cover over the glass bowl on the bottom has a rubber hose on the bottom with a valve in it. Pushing the hose sideways with a finger opens the pressurized valve, allowing water to be purged. Next to the water trap, I have a manual knob and gauge that allows me to lower the air pressure for spraying.
-
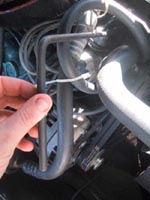
Distributor Wrench In Use
|
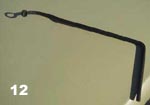 In trying to adjust my distributor on Imperial Margarine, I had a devil of a time getting down to the little bolt that cinches down the distributor. I went to the tool store to get a cheap, long box wrench that I could bend to fit in a vise. Instead, I found this handy item. I was able to do all adjustments easily and quickly. If you plan to touch your distributor, this one's worth the scratch.
-
 This is a slide hammer. The blue handle slides up and down on the center shaft. You screw or hook one of several different fittings onto the end, and hold the black handle with one hand, and gripping the blue handle/weight with the other. The blue handle is then slapped against the black handle. Instead of pounding down like a hammer, this tool pulls up and is normally used to pull dents out while the tip is hooked or screwed into the sheetmetal.
|

