-
10/02/02 Undercarriage:
I have just completed using a grinder with wire wheel attachments to remove dirt, scale, and rust from the frame, which is in great condition. Once the under carriage was cleaned with both the grinder and high pressure water, I used flat black spray paint on the undercoating, and Eastwood's Chassis Black on the metal frame rails, suspension components, and rear-end.
I dissolved all of the rust from the loose components such as the drums using a large vat of vinegar. I usually soak the items fully submerged for 24 hours. Once I remove them from soaking in the tub of vinegar, I blast them off with a garden hose and then scrub with an SOS pad. An SOS pad is steel wool impregnated with soap. This removes most of the remainder of the rust that has already been weakened by the vinegar. The drums were an exception. The drums were so deeply rusted that it took two cycles to get the rust removed. Once the rust was gone, I came to realized that the drums had been turned and the brakes done shortly before the car was abandoned. There was plenty of meat left on the brake pads, and I am also pleasantly surprised to find the ball joints and steering linkages to be quite tight. This will save a few dollars on the replacement parts. The parts that I plan to redo are the ball joint boots (I mistakenly used a tie rod separator and not a ball joint separator. They look the same and are called pickle forks by some. The ball joint separator is wider, and the smaller tie rod tool mangled the soft boots when I hammered on it to try to force it to fit in my ignorance).
Vinegar Brake Drum Cleaning Process
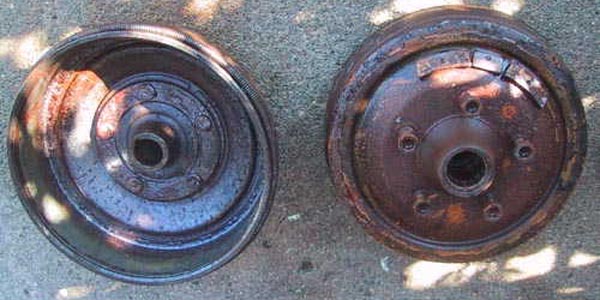
1. Drums "Before"
|
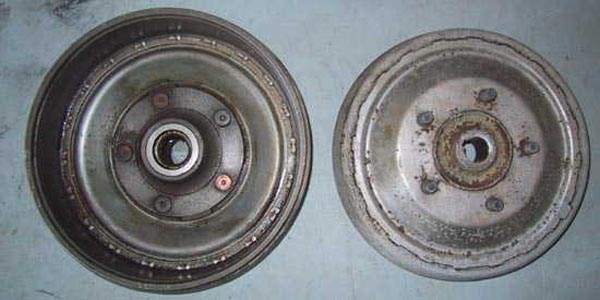
3. Drums "After"
|
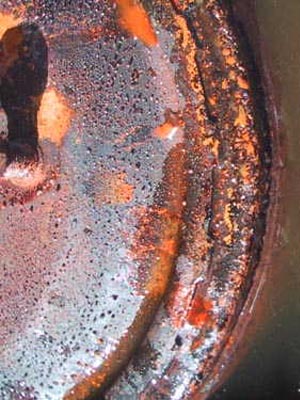
3. Drums "During" (in vinegar)
|
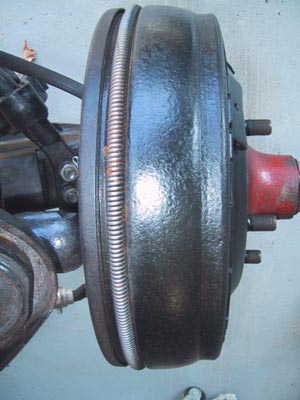
4. Drums "After Painting" & Installation
|
The drums have a spring around their circumference. The vinegar freed this and allowed me to remove it and repaint it. The paint didn't penetrate the interior of the spring and when water hit it later, the rust re-appeared from the interior. Maybe stretch the spring to get paint inside? Next time, maybe. To much left to do for a redo now.
The other undercarriage items that will be redone:
- All rubber bushings
- Shocks
- Rear leaf-spring bushings
- Rear-end seals
- All-new brake lines, wheel cylinders, pads, and a dual master
cylinder
- Brake booster
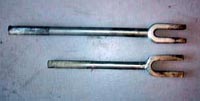
Tie Rod (or 'Pickle') Forks
|
In removing the front suspension components, I managed to mangle the dust covers on the ball joints. This damage was done by using a tie-rod fork to try to separate the ball joints, where a ball-joint fork was called for. These are different tools, with the ball joint tool having a wider gap between the tines of the fork. When I used the smaller fork on the larger ball joints, I totally trashed the rubber ball-joint covers. Investigation at the tool shop revealed that I had the wrong tool.
The rubber ball-joint covers proved terribly difficult to find, as the worldwide ball joint manufacturing consortium would prefer that you purchase a new ball joint for $30 rather than rehabbing the existing one with a cover. There are four of these, and I'm too cheap to spend $120.
Energy Suspension Components manufactures the really nice polyurethane suspension components that go onto more common applications. They do no make an Imperial ball joint cover, but they have others. I got the largest ones that I could, and used a Dremel tool to widen the hole for the threaded rod so that they would fit. I should mention that after having searched all over and having called all over, the Energy Suspension rep sent me two for free. They were gracious and quite easy to deal with. If you need these dust covers, you would do well to try to find something close, and then widen the hole, as Imperial ball-joint kingpins are thicker than almost any other car. Get your replacement covers as thick and deep skirted as you can!!
- Tires:
As part of the Imperial Mailing List, I have been witness to many debates on the merits of Radial tires vs. Bias Ply tires. Bias Ply was the type of tire used until the late 1960's and is the correct tire for this car. People use Radials these days to save money and because they are considered "safer" by some. The radial has a much stiffer sidewall, and is reportedly so stiff that it can induce flex in the wheels designed for Bias tires. The result of this flexing is potential loss of hubcaps at worst, a squeaking "crick"ing sound from the hucaps' retaining tines in some cases, and no effect in others. I get the impression that it depends on the individual rim being used, as some seem to resist the effects of radials better than others, and this is not isolated by year of manufacture or even to the lot that the rim is from, as some people report having only one or two rims on the same car that exhibit creaking or a tendency to throw hubcaps.
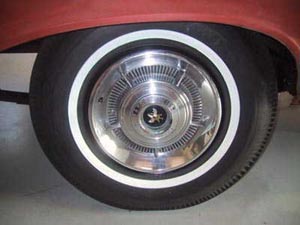
Bias-Ply Tires Mounted
|
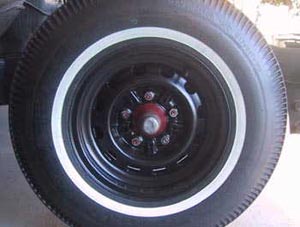
Rim After Clean-up and Tire Mounting
|
Regardless, since many people have not compared Bias Ply to Radial tires for themselves since the Bias tires have been obsolete for modern cars, I give the following report: Pre 1970's cars were designed with bias tires in mind. Bias tires are softer, like balloon tires, and contribute to the ride of the car. The Imperial's suspension was tuned to these tires, and the car just won't ride the same without them. Radials impart a harsh ride due to stiffer sidewalls. The Bias tires' weakness is in cornering. They are taller than most radials, and fill the wheel well better, but have a very tall tread block. When cornering, the tread tends to squirm around, giving the impression that the tire is being rolled sideways under the car. As the tread leaves contact with the road when being cornered hard, the tread block snaps back to its normal position, giving a sound of the rubber as it tears across the concrete while it is momentarily unloaded but still in contact with the ground. The closest analogy would be to say that it sounds like the sound that Velcro makes when pulled apart, but it is rubber and asphalt related sound instead. Once one becomes accustomed to the feel of bias tires, it is usually a change that is worth keeping. I think that the improvement of ride and stunning original looks of bias ply tires is worth the step down in cornering stability. I bought BF Goodrich Silver Town tires, as they are what were on my first 1960 and I like their looks. I spent about $1,100 for five tires from Coker tire, and regret buying the extended warranty, as they have yet to be mounted to the car, and I have had them for over a year already.
|

