Primer and wet sanding
As mentioned earlier, I have been using Evercoat body prep products and am most pleased with their consistency and ease of use so far. The car is to be black, and I shot the car in Evercoat Easy Sand black primer (comes in other colors).
Prior to spraying the primer, I blocked down the car with hand boards that had 180 grit paper on them to prepare the surface for primer. I paid special attention to sanding the areas that I knew had had my hands on them so that Iíd be applying primer to fresh bodywork, and not fingerprint oils as much as I could.
I was really astounded at what a great product this primer is. It cost about $55 for a gallon (need 1.5 for this car). It is a catalyzed primer requires that a small tube of clear catalyst be added to each quart, but it sprayed on very smoothly and easily.
I didnít shoot enough onto the roof, and had the spray gun in hand and was alone when I figured out that I needed the ladder to really reach over for spraying the roof. Once you mix the paint or primer and the catalyst, you only have so much time before it cures up and refuses to spray/setup correctly. The stuff I was using was good for 50 minutes, but I just didnít want to traipse out to the back yard for a ladder and ruin my groove. I sprayed the roof and hoped for the best, but will need to apply another coat to do it right.
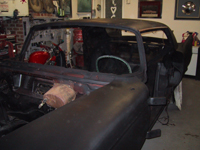
The rest of the car came out great, and I shot the shell, fenders, radiator support, and other items separately. I then slid the dried fenders onto the shell and had a semblance of a car for the first time in months.
Next I broke out 400 grit sandpaper and the hose and started sanding. This is where the surprise came. Iím used to primer being hard and somewhat gritty when you sand it. This primer was almost plastic in its feel, and changed color when sanded. I did a section on the rear area of the fin in the attached picture to illustrate the color change between sanded and un-sanded.
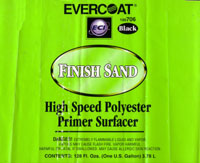
The impressive part of this primer is that the color contrast between sanded and un-sanded is great enough that it is easily visible when there is water running over the panel and your wet-sand block is doing the work. I was able to sand the entire car in one orbit and only had a few places that needed touchup after-words. The car sanded quickly and efficiently, and I was done in an afternoon. This stuff was absolutely fantastic to work with, and I have scanned the label so that youíll know what to look for.

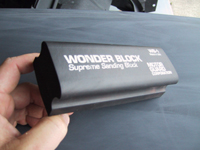
When wet sanding, I used the same foam block that I had used previously to sand down the rear sail panel. I also got something called a Wonder Bock, and was skeptical, but its shape worked really well in the curves and narrow spots like the character lines that go down the side of the car. Iíd highly encourage the purchase of a few different shapes of sanding blocks, and think that the firm but flexible foam blocks to be the best for most sanding of curved surfaces.

The sanding that I did where the primer went from black to gray when being sanded is called color sanding, with the goal to have the entire sanded areas all the same sanded color with no low spots that are un-sanded and hence dark in appearance. I did all color sanding by hand, and the work went quite quickly.
Well Duh!
Ok- so I spray the car in black primer and wetsand it with 400 grit. The 240 that I tried dug too deeply into the primer and I spent more time getting rid of those scratches than I did just sanding the stuff level with the 400. The primer has lots of solids and is thick. It dried into a very coarse orange peel surface, and I had to sand down to the lowest common denominator to make it smooth.
When I sanded the roof by hand, there were pits and craters that would require hours of sanding and were showing the red rust killer, so I knew that I didnít have adequate coverage.
Back to the drawing board and a quick scuff with 180 grit to prep the body shell for a thicker coat of primer. All of that sanding down the drain, so to speak.
I respray and there is more orange peel this time. I spent 4 hours hand sanding the car but keep thinking about the directions on the can saying that I should start sanding with a machine. I had been sanding the body to do rough cuts with the 80-grit paper, and it tended to really tear things up. This is what I had unconsciously associated with using the air tool, and I deemed it too rough for the finish work that I was doing.
Anyway, I spent another 4 hours working the shell and front fenders with the 400 grit, but thereís still areas with pits and low spots the size of pencil points where I will have to do some serious labor to remove a few more microns or whatever of primer over the whole car with 400 grit. I spent much of the 90 minutes that I spent sanding the roof reconciling myself to the fact that Iím just not willing to spend another 3 hours up there. After I go most of the way around and on top of the car there are still lots of little pinholes that are less than a human hair deep, but there none-the-less. The rear quarter panel on the bottom area is really, really rough.
I start mentally flailing about for a way out of the elbow grease involved in reducing THAT area to a flat plane. I suddenly remember that I have a bunch of leftover 220 adhesive sanding discs and abandon my reluctance to use a tool.
I should mention that if you own an orbital sander, you will need adhesive discs for it. Part of this job used up the discs that I had bought in volume and used on the last 3 cars that I have done work on. I bought another large batch at the auto paint place, as theyíre cheaper in volume. I would suggest against buying small quantities to save money if you think that there is any chance that youíll ever do this again.
The paper that I got is 3M.
A special bonus is that the non-adhesive version is ď3M IMPERIALĒ sandpaper.
-Accept no substitutes!
POW! The air powered orbital tool zaps the primer down flat and smooth in about 45 seconds for the whole panel with only a light touch, as the primer is really soft and easy to work (good formulation!).
Next thing 10 minutes later, Iíve gone over the entire car (dry with the tool Ė the water will remove the adhesive and the disc will fly off of the tool) with the orbital and effectively zapped all of the pinholes, leaving a really smooth, 220-scuffed surface behind. The 220 is followed by my trusty hand-held 400 grit wrapped around a block, followed by 400 on a board sander. The bottoms of my board sanders have swiss-cheese holes in them on the bottom that increase the cutting edge area on the sandpaper
I just spent 4-5 hours doing what I just redid in about 20 minutes. DOH!
Live and learn. That means that the hood, trunk, and doors are no big deal, so thereís my rationalization. Glad I at least learned that one, even if I pretty much only got a tan out of all the time that I spent out in the sun.
Next are the doors, which are from that 1963 demo derby car. Iíll remove the glass, which has a different curve. The window mechanisms will come out if I can get them easily, although I removed the ones from the other carís doors before I knew that I was going to trade them for the perfect 1963 doors. The window mechanisms are usually gunked up and sticky with congealed grease that needs to be cleaned off so that theyíll work properly.
A good side window in a 1960 should go up so quickly that it conjures images of a guillotine. Kiddie fingers and arms were of little concern at that point, and I really want that part of the car to work well. These things usually have motor and lift mechanism combos that yield 4 different actuation speeds due to wear and clogged or dry mechanisms. Weíll see about that.
The other plan for the doors is an enlargement of the drain holes, as well as a cleaning and then sealing of the interior surfaces to kill and prevent any rust from forming or creeping there. This is a weakness of the car body, and most are rotten there. I plan to avoid ever seeing rust there if I can!
The hood an rear decklid are the same deal as primering the body, so Iíll do those up and probably skip mentioning how they go, as I think that theyíll be just like the body in how I work on them.
 The car is now in primer, and I hope to have some spare time to paint it in the next month between the work that Iím doing on my career change. Iíll update the epic when that happens.

