2003 - Work continues.
 After taking a breather on the car during January, I'm back at it.
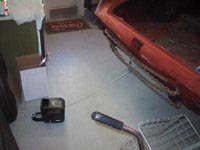
I keep my garage very clean, and to do the work I rolled the car down the driveway. The brakes work now, and that's no big deal. I drilled a 5/8-inch hole at an angle pointing away from the car at the rear of the garage, and put a 5/8-inch grade 8 bolt with a large washer in the hole and stomped it in. I'll use it as a peg to loop the stamped steel plate over. This is the anchor point for the $49, 12 volt, 2000lb winch (it's the black box on floor in picture attached to the peg and a chain on the rear of the car) that I bought last year with the idea that I'd use it to haul dead cars up into the side yard. It's too weak to pull a car over a curb with no engine in it, so I'm using it as a retriever for the car when I'm done sanding, spraying or melting lead. I like to roll the car outside and onto the driveway to do this messy work.
This procedure keeps the dust and dirt level down in the garage, and allows me to sweep the place out too. I painted the garage floor, by the way, and suggest against it during a restoration project. The gray floor shows every single piece of dirt and requires frequent attention. If I ever get through the dirtiness of a restoration, I think that it'll be fine for everyday, but the dirt just seems to get ground in and resists everything but me on my knees with liquid Tide and a scrub brush. Screw that. I'll work on my car, thank you.
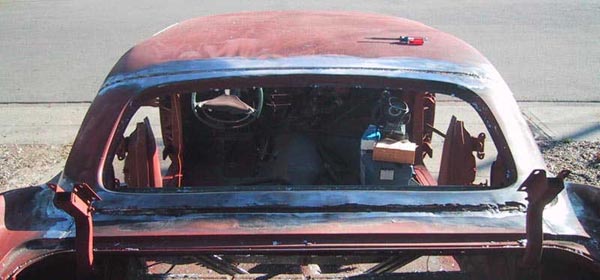
Today, I used an acetylene torch to melt the lead filler out of the rear window surround. I wore glasses, respirator, and ear covering the entire day. As described earlier, the rear window opening on the LeBaron is smaller than the standard cars. It is a steel insert that was welded into the standard opening and then had an asbestos rope nailed into the crevice, covered by lead in place of body filler. Modern body filler (bondo) had yet to be invented at that time, so lead was widely used to cover seams and such back then.

I melted the lead out, and it came off in torrents. I think that the car may have shed as much as 35 pounds today. The channel still has remnants of the asbestos rope in there, and I am chipping away at the fossilized rope with a screwdriver and its coming out in shards and shreds. Very time consuming.
 In melting out the lead, I used the torch and a screwdriver to chase/splash the lead out. The lead would melt and ball up, and if you flick it the right way, it will splash out if you get it when it is transitioning from a liquid to a solid. This is for the stuff that didn't melt and drip away on its own.
I'd heat the surface up, and the Corroless rust Encapsulator that I'd sprayed on the entire shell much earlier burned up under the flame where I was working and revealed shiny lead that would then come to a boil and then flow away in a very messy fashion. I wound up with splattered pools of lead on the driveway, and wish that I'd done it over dirt, but that couldn't be avoided. I'll probably spend some time with the torch melting the gack off of the driveway this week.
Anyway, The lead-work on the car was most impressive. It goes all the way around the window seam, and also across the two body-joint seams that are where the various body and roof stampings meet and are welded together. There was also lead in the valley created between the fin and the sail panel.
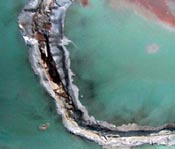
When I had been sanding the car, I went to bare metal and noticed that there was a wavy design in the coloration of the metal. Some of the blue navy planes in World War II had white on the bottom and there was a wavy transition line where the blue of the top part met it. That's what this reminds me of, and I'm most curious. I had assumed that this was a transition line where the lead ended and the steel of the body began.
After melting the lead off and thinking that I was done, I realized that there were still tiny globules of lead on the surface. I took the 10,000 rpm grinder that has an industrial wire rope wheel on it and blazed away on the exposed surfaces. It removed the lead, but only slowly. I got the torch back out and held a large bath towel in the other hand. I would work a 5-inch section of the previously leaded surface, and when the steel hit the melting point for the lead, the lead would bead on the surface, and I'd wipe the surface clean with the towel. This worked great to produce a smooth, shiny surface that appears clean and free of lead.
I then went over the surface with the wire wheel again, and feel it to be as clean as I can get it with the methods that I'm using. The silvery coloration remains, and I must assume that the steel is either stained (some sort of preparation?) or still has lead in/on it. I rubbed a key-ring against it and it was suspiciously slippery and prone to leaving silvery scratches. I believe this to be "tinning" which is where the steel was prepared for the subsequent application of lead.
One interesting note is the thickness of the lead. The body panels are remarkably close in their levels, and there is some wrinkling in the steel where the sharpest curves are. I can see why lead was put in there, but when they did it, they didn't skimp on the materials! At one place in the sail panel, there was easily 5-7mm of lead that I was removing, right about where the gold sail panel crest is located. There was easily 1-4mm or more everywhere else, and with the famous rule that modern, plastic body filler is to be used sparingly, this stuff was really slathered on. I wouldn't doubt that it was a challenge to apply, so they may have put a bunch on and then filed it down to where it looked good and left it at that.
I will proceed to clean out the channel and plan to go in with a spot-welder just to reinforce what's already in there. The seam is quite apparent, and welding should not present a challenge unless the tip is too large.

