-
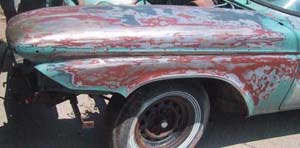
 Sand the remaining paint to feather the edges of the paint and bare metal
so that there is a smooth transition between the two, removing any and all
traces of surface rust from scratches in the process. A scratch that you
can see on the surface will normally have little veins of rust spreading out
from it under the paint, so all spots that flake apart under the sander are
then sanded out to expose bare metal all around and to uncover any rust
that's under the factory sealer. I do leave the patches of paint that is
unblemished, as I trust the original factory seal on the metal more than I
trust my own prep work and figure that having lasted 40 years already is
good enough for me. I'll smooth out the transitions when I spray the
consecutive coats of Rust Encapsulator and sandable primer. The rust
killer goes on thick and coarse and acts as a good filler when sanded.
Several coats of primer will be sanded and smooth out the surface further.
The bare metal still has rust in its fabric, and I don't ever want to see
the rust again, so I put SEM rust-seal onto the bare metal. It turns all
rust black or deep purple, neutralizing it. The Rust Encapsulator goes on
top of that as a rust seal/killer. I would prefer to be safe due to the
high amount of surface rust that is present on the shell from Marin. The
SEM turns a golden color and looks like it did something to the rust.
Hope it works out!
-
There are a few dents that need pulling with the slide hammer and have old
Bondo body filler that was put in as filler removed. The surface was not stabilized
first, and the rust has lifted the Bondo off. I will kill ALL rust first,
coat the surface, and then apply any filler as needed. Michael Ulander and
Mark Boheme came over one day during the early stages for a quickie intro
to the various tools used for sanding and working the body.
Note the Imperial Roses in the foreground?
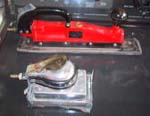
 The air tools used are the Orbital Sander, which is the round one. The
board sander is the long straight red one, and the jitter-bug is the more
compact squared one. All three operate on the same principal, in that they
vibrate an abrasive against the body panel. The Orbital is the most
commonly seen sander at many body shops, and takes adhesive sandpaper discs
 that are a peel and stick affair. The other two have spring-loaded clamps
that you slip a standard piece of sandpaper into. I use 80-grit discs on
the orbital and then finer grits with the other two. The board sander is
the one that I use to flatten out body filler on flat panels, and each has
its own use. I bought cheapies on Ebay and feel like I more than got my
money out of them. They're relatively simple and not prone to failure as
far as I can see.

-
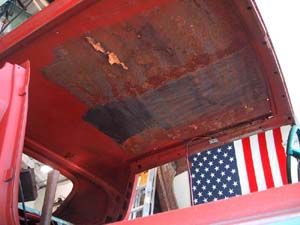
Use a wire wheel on a grinder on the frame and the interior (roof) to
remove rust.
The rust in the foreground is what was there. The cleaner area is cleaner
than it looks and is really smooth. The red is Rust Encapsulator, formerly
called Corroless and found at eastwood.com
-
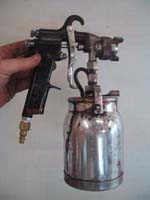
Spray Corroless* Rust Encapsulator onto the bare metal that has had rust on
it at any time. I sprayed outside and learned a lesson. When I stood back
and let the paint gun go full blast,
 the over spray balled into little
droplets that then coagulated and landed on the body. I did too much too
fast, and when I went back later the body felt like it was texturized. I
brushed it with a soft household broom, and 50% of the paint came off! I
subsequently sprayed the bare frame in the engine compartment, and was more
sparing with the trigger of the paint gun and used a lower pressure - about
50PSI. Using less trigger at closer range with lower air pressure yielded
the correct coverage and I was amazed at how much control the paint gun has.
I will never use a can of spray paint again if I can avoid it!! I should
mention that this is the first time that I have sprayed using compressed
air, so this is a learning process.
|

